About this blog

In this blog I'm going to show you my watercolor paintings, and also the step by step for some of them.
I'm also going to share some of my digital artwork, 3d images created and rendered in Bryce.

I will post also some of my crafty projects and some pics of the place where I live, just for fun!
Hope you'll enjoy!!!

All images published are © Marissa Gabetta

Labels

watercolor (11) watercolor painting (11) art (8) dog (8) painting (8) custom portrait (7) portrait (7) demo (6) home (6) fun (5) face (4) step by step (4) lake (3) pet (3) pets (3) view (3) paper (2) review (2) test (2) 3d (1) Ikea (1) Marilyn Monroe (1) abstract (1) brush (1) color chart (1) drawing (1) food (1) pencil (1) sewing (1) still life (1)
Showing posts with label watercolor painting. Show all posts

Sunday, June 22, 2014

Rory - Beagle portrait demo

This is a portrait or Rory, Zoe's sister.
For the colors I used, please have a look at Zoe's post.


Pin It!

Sunday, June 8, 2014

Tod in the woods - Beagle portrait demo

Here is another beagle portrait I was asked to paint. It was done on a quart sheet of Arches 300 grs.


Here is the start, cad red, UMB, "black", yellow ochre, raw umber, lemon yellow.


Slowly building up shadows and light. Started working on the eyes with sepia and burnt sienna.


Trying to achieve depth of color and facial expression.


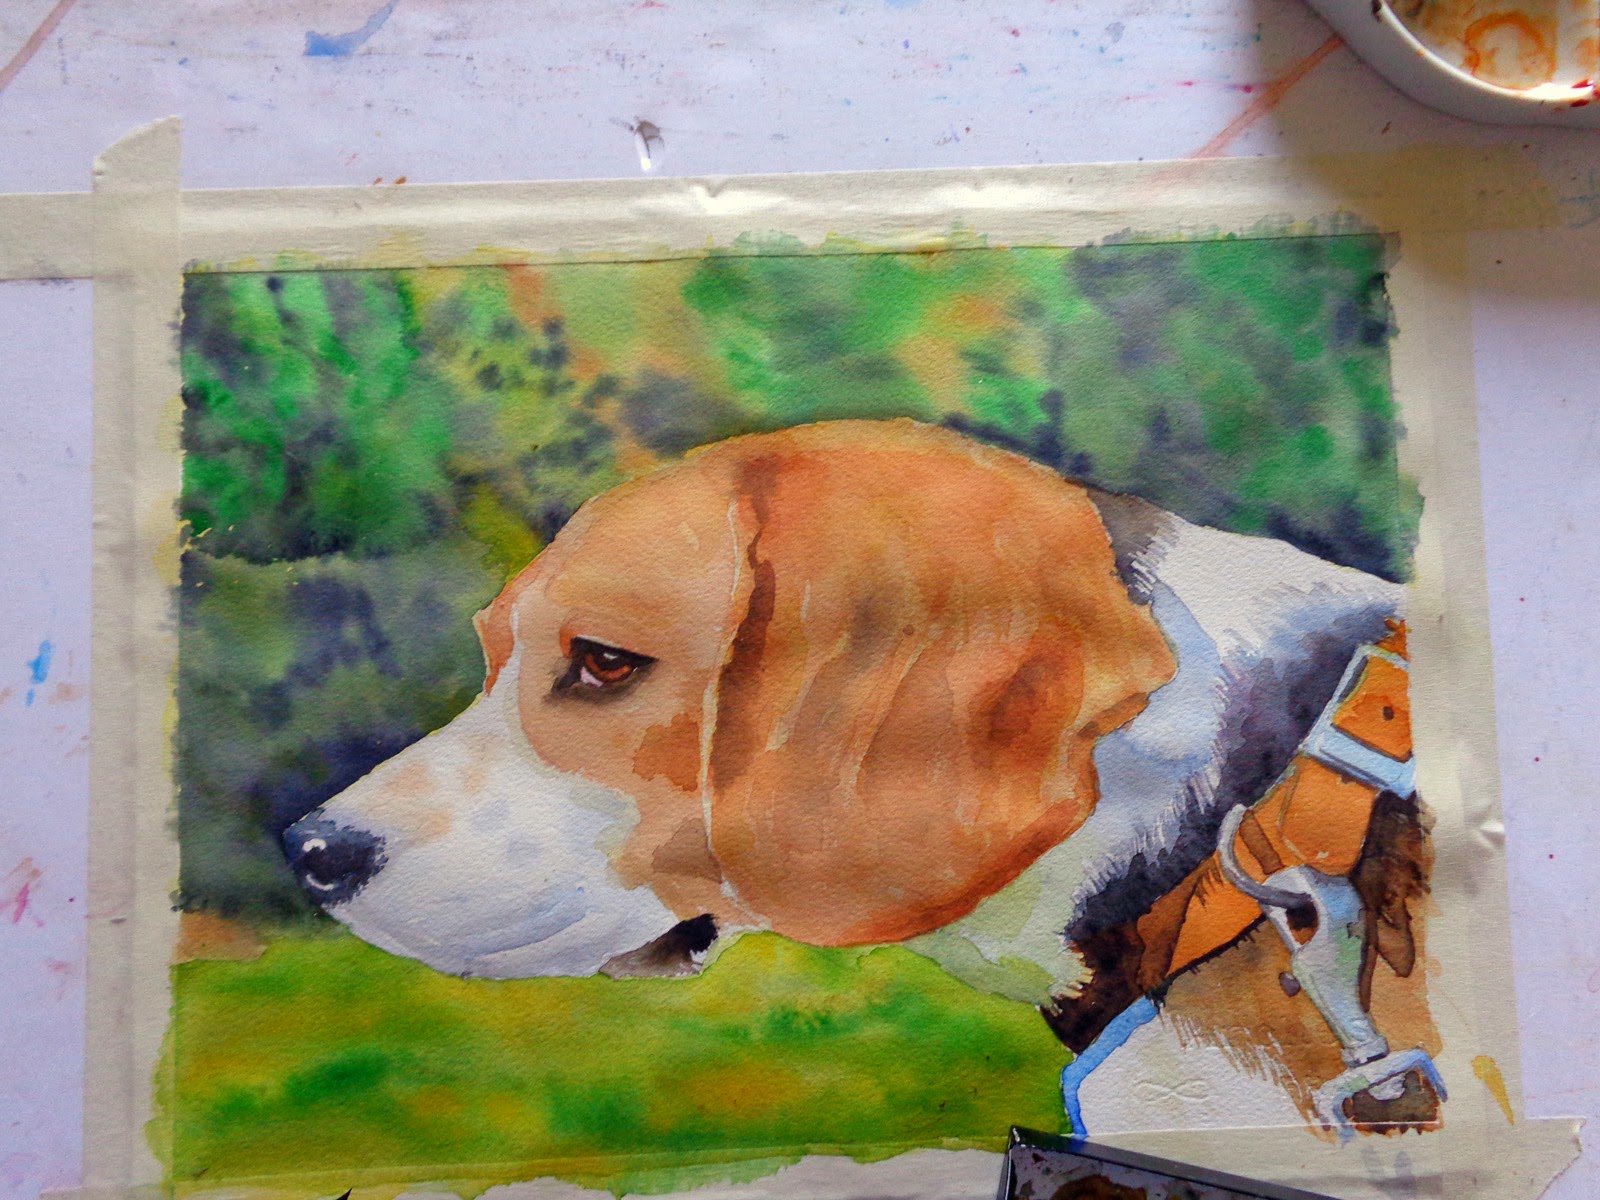
Now it's time for the background. I did not like the one in the photo, so I decided that placing a blurred forest would do the trick. Used lemon yellow and indian yellow, viridian, and the same colors used in the fur.


adding more color and spattering for the foliage. Used sap green, viridian and neutral tint.


And here it is, finished!

Pin It!

Thursday, May 29, 2014

Zoe- Beagle portrait demo

This is a portrait I painted for one of my friend's 2 beagles, her name is Zoe


I started with the dog, using yellow ochre and raw umber, plus a mix of viridian and purple magenta to get the black for the nose and part of the fur.


added some burnt sienna and translucent orange to the fur and burnt sienna and sepia for the eye. I'm working dry on dry softening some of the edges with water.


Started to do the background with cad yellow and sap green and some viridian, wetting the area first.


Always wet on wet, I painted the first layer of the distant foliage, using lemon yellow, some translucent orange and indian yellow.


I let the first wash dry, rewetted the surface and added neutral tint, sap green and viridian to give the impression of distant trees and bushes.


And this is the finished painting. I did some fine tuning on the hair near the mouth and retouched the metal stuff with some white gouache. Done!

Pin It!

Tuesday, May 20, 2014

Buddy's first portrait

More to the joy I'm sharing with my furry friend, I also got an irresistible will to paint again.
So here is the portrait I painted yesterday.


here is the first wash, I used UMB, permanent rose, translucent orange, indian yellow, yellow ochre, Van Dyke brown and burnt sienna


Used the same colors and mixed up some black for the nose using viridian green plus permanent rose


Using the same colors in the next layers, added sepia for the "eyeliner"


Here is Buddy inspecting his portrait..... :D


And here the finished work!

Pin It!

Wednesday, March 19, 2014

FAA sale

I'm so pleased about this, a very nice good morning!!!


http://fineartamerica.com/saleannouncement.html?id=717035f7a7a5ef80a32f642b7c2b32aa

Pin It!

Monday, March 10, 2014

Chris & Lily, new custom portrait step by step

So here is my latest portrait, dad and baby daughter that show joy and love.
The challenge here was the dad, and giving him a "manly" appearance compared to the radiosity and freshness of Lily.
So here we go.....


Here I began the background, working both wet into wet and wet into dry to get texture on the tiles.


Working on the tiles, adding dry brush strokes.


I used some wax resist here and there, for texture's sake


Working glaze after glaze, I added some indian yellow for warmth, and some white to mimic the veins of the stone.


Masking fluid off the grouts, and began giving shadows.


Let's start the faces with the underpainting of aureolin yellow and indian yellow. I first wet the area and when the shine from the paper begins to disappear, I apply the pigments. Paper still wet in this photo.


3rd wash of yellows. It's beginning to have tridimensionality.
Working on the faces requires lots of patience, no rush here!


I mixed my skin tones, I will use these colors from now on, varying the amount of this or that color to get the hue I need.


This is the first glaze of skintone, I avoid the highlight areas and work with lost and found edges.


This is the alien stage.....I added some translucent orange to Lily's face to give, well, translucency.... :)


Working on the skin.....I also added some grayed down UMB to the eyes.
The gray dots you see is masking fluid, to preserve light where the droplets will be.


Beginning to shape dad's eyes, using phtalo blue and indigo.
I also started to paint his hair.


Deepened the eyes' color, and slowly building up the skin....some more color where the hair will be.


In order to work on smaller areas, in addition to the glasses I always wear, I cannot do without this magnifying glass I bought many years ago to do miniature cross stitch........that's when my sight began to get worse...


now that I've been working more on the skin and eyes, it's time to tackle the mouths....and the droplets!!!!


Still working on the skin, Lily's fine hair, shadows and lips. Did Lily's eyelashes, that must give the impression of being wet. Working on the eyebrows.


Working on hair and lips. I slightly grayed down the teeth, because leaving them white would not give a naturale effect.


More work on the hair, darkened the angles of the mouth. The contour of the hair is too harsh so I will need to work more on this.


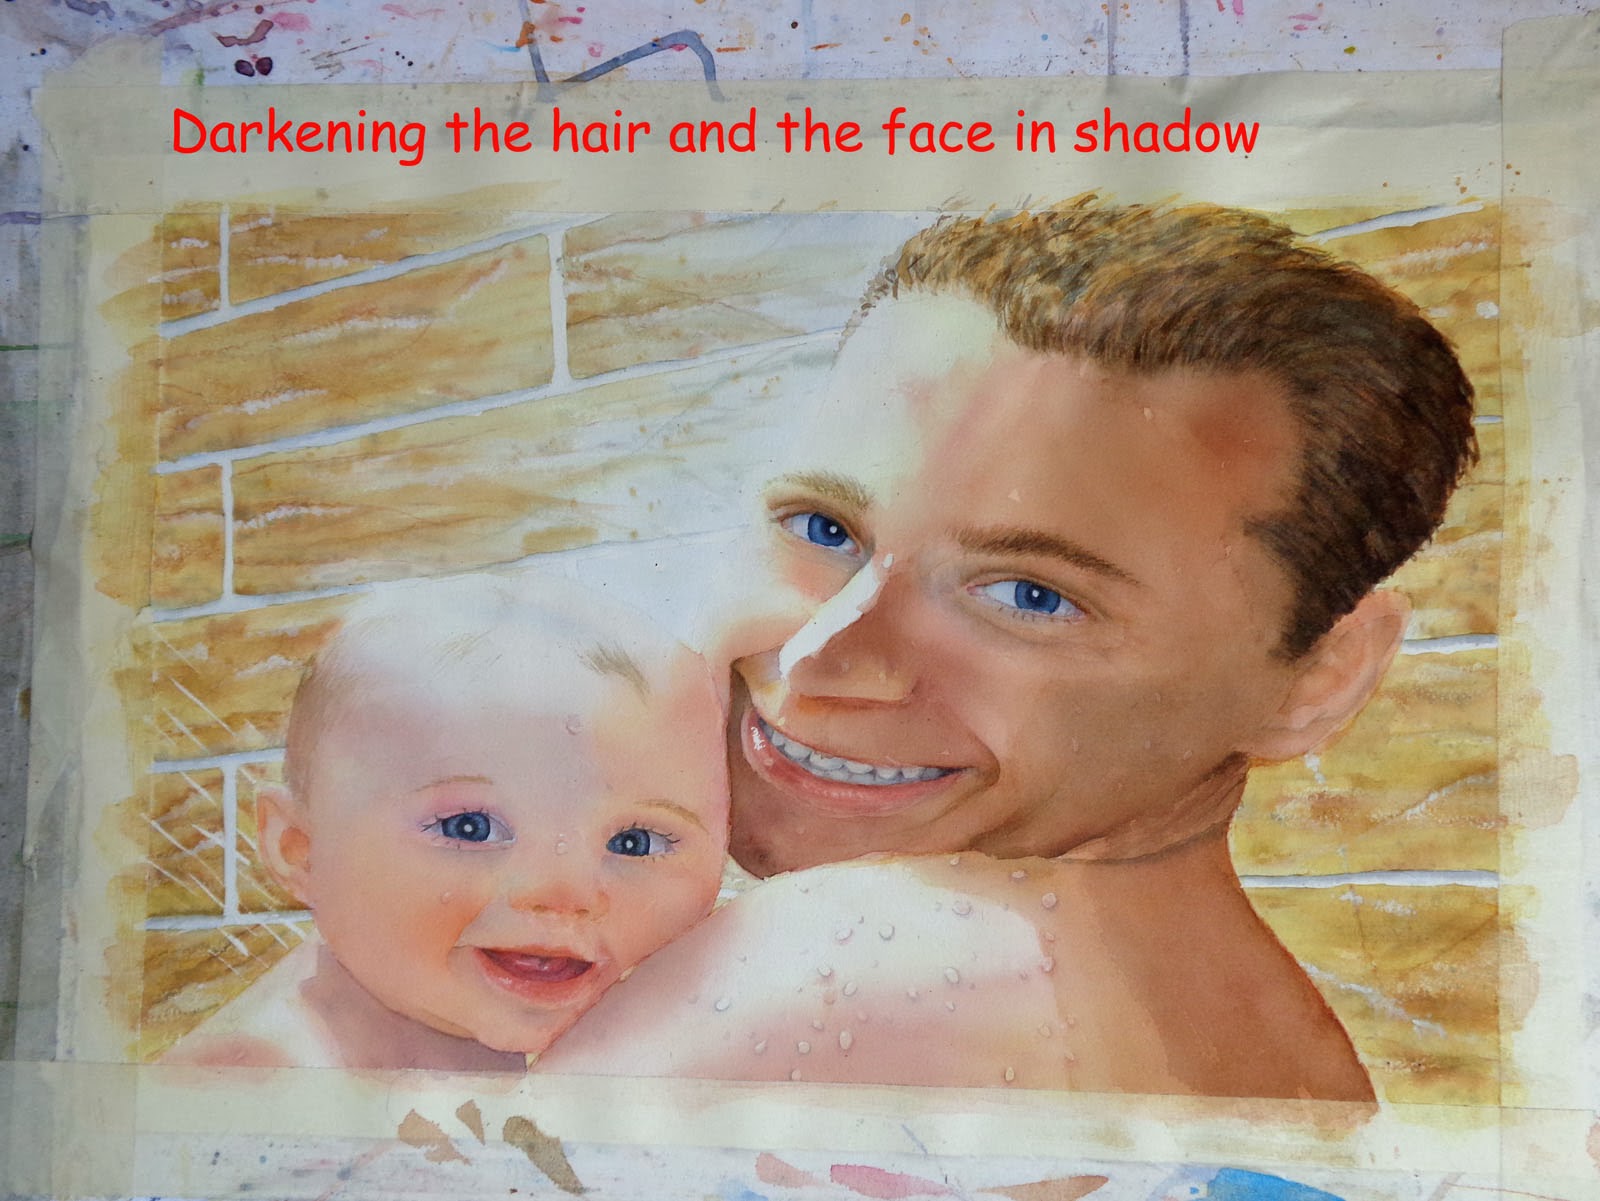
Working my way through, going darker on the shadows and on the hair.
I also gave a dark wash on the jaw, to give the impression of cut beard.


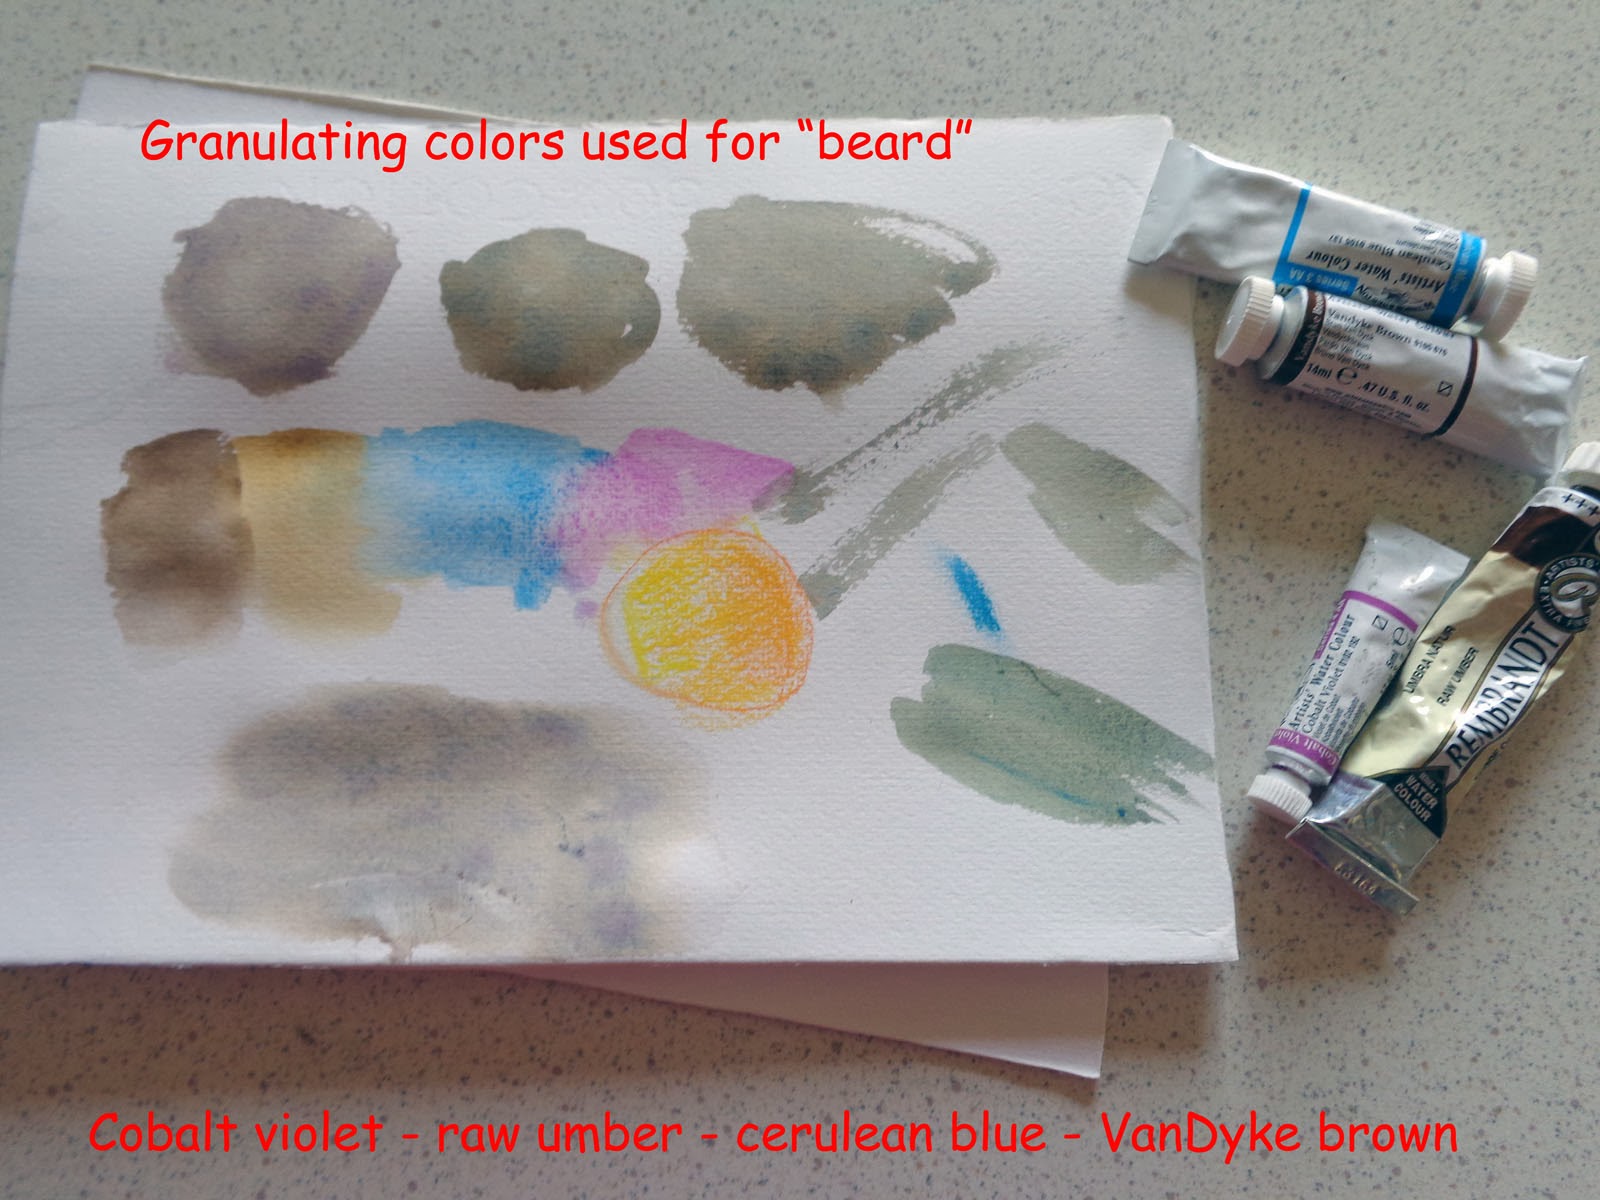
These are the colors I used for the "beard". They are mostly granulating colors, as I also need texture. In addition to this, once the color was applied to the area, I sprinkled over some fine jojoba beads in order to get even more texture.


Still working on the "beard" and hair


As the background was too similar to the skin tones, I decided to turn them greenish, to give more contrast and definition.
In order to achieve this, I glazed over them with cerulen blue, then sap green, and finally quin gold. Working on the droplets as well.


This is a particular of the skin


Now for the fun part, peeling off the masking tape..... :)


........et voilĂ !!!


Painting done!
Hope you found this demo useful.

Pin It!